The Bigfoot project
A toolbet for IoT software tools that work together.
- Discover devices automatically
- Have pre-made or many compatible user interfaces
- Simple, lightweight APIs
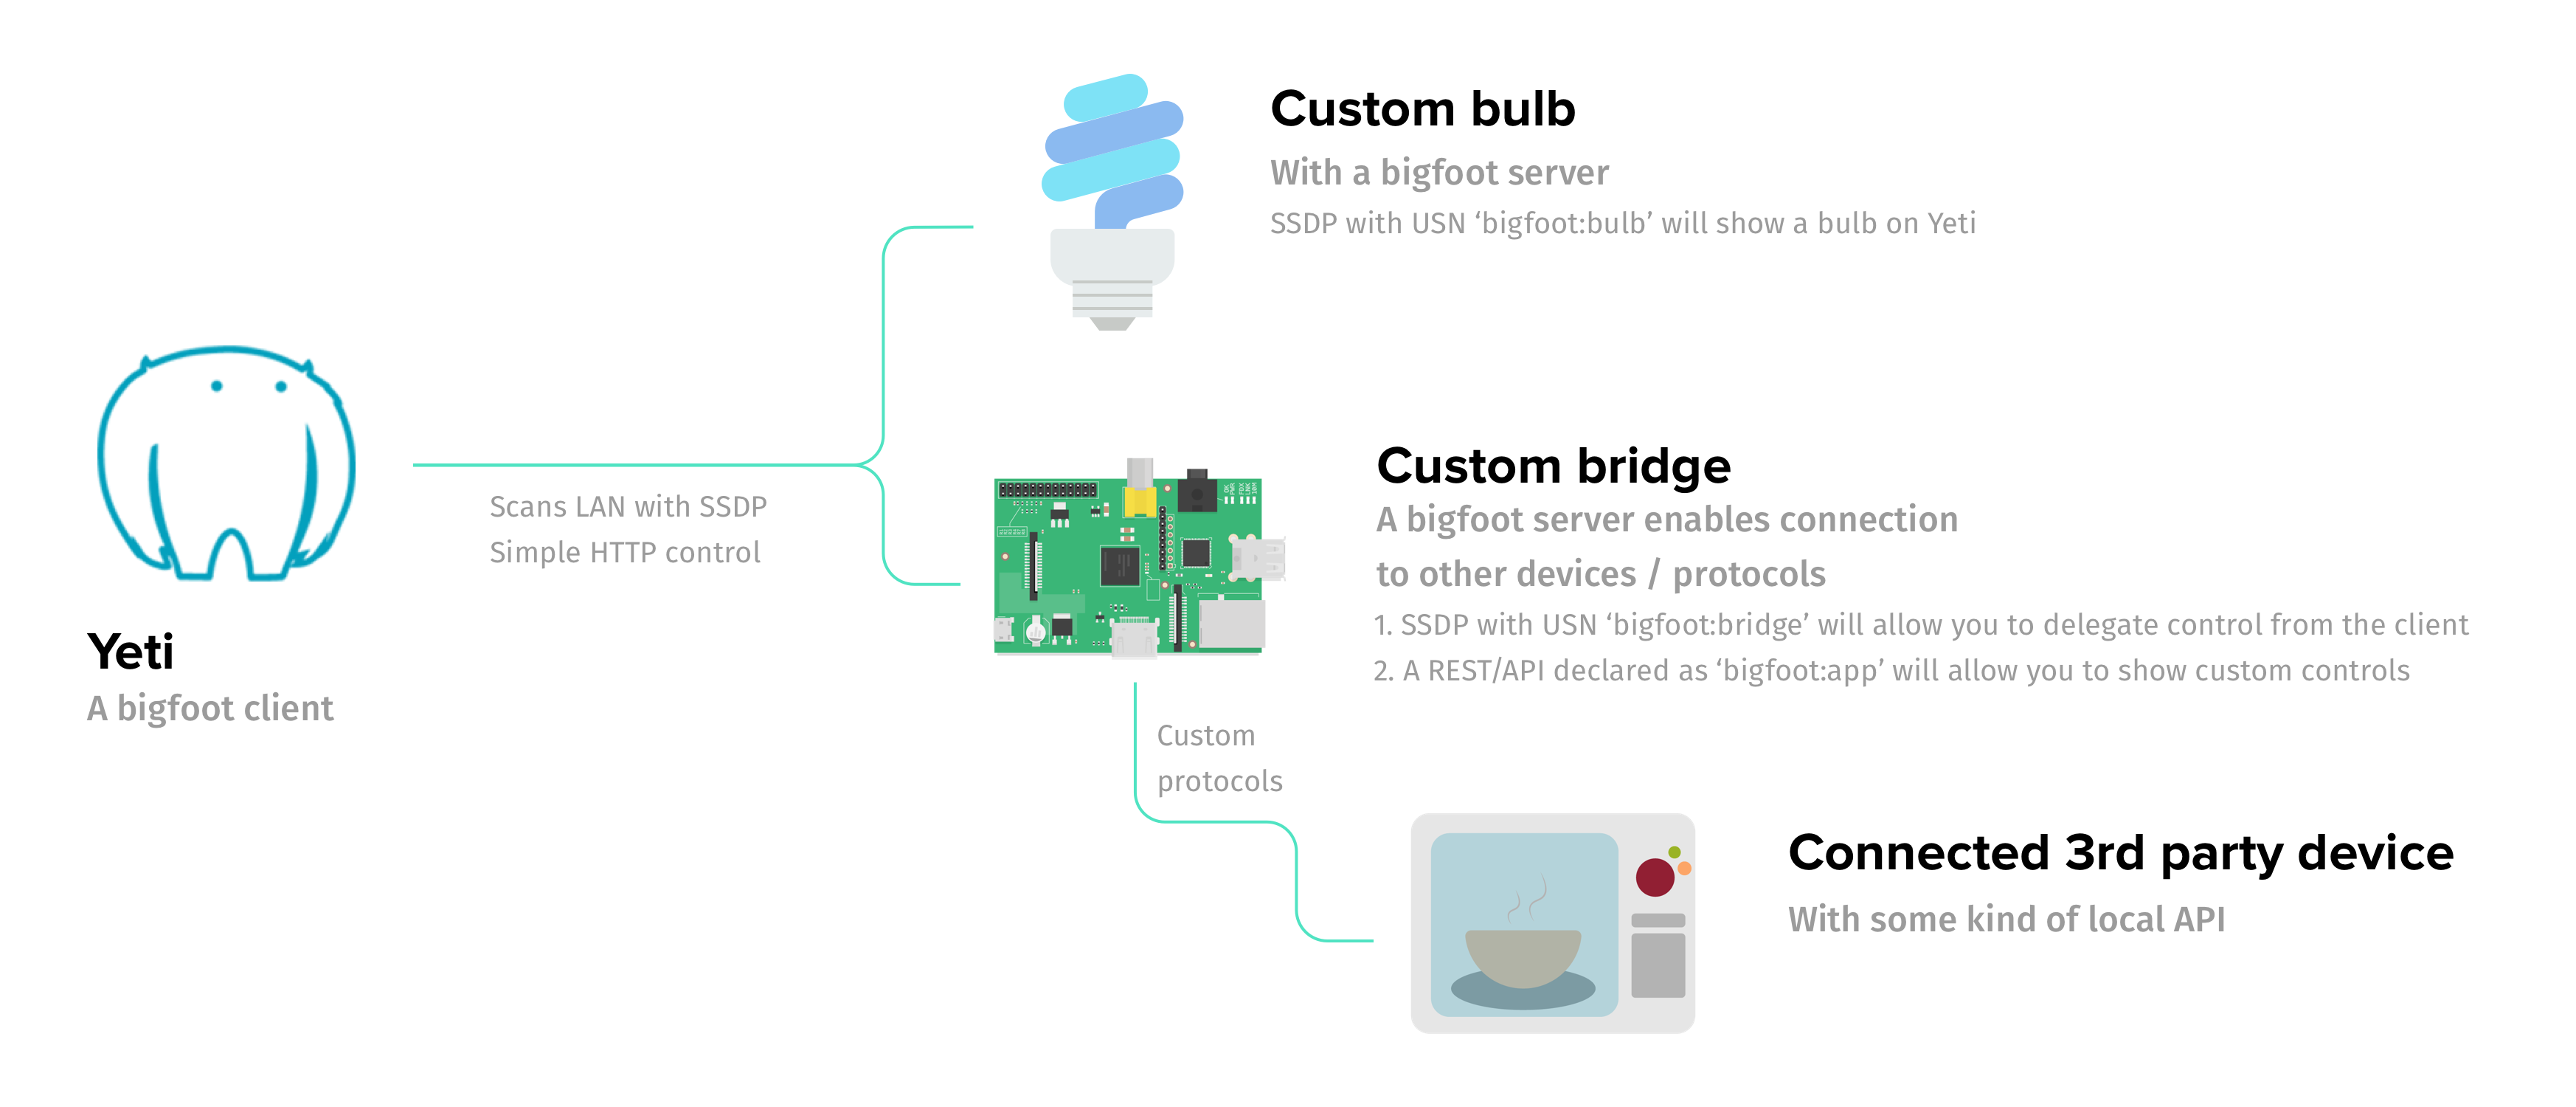
How does it work?
Get started
This guide will allow you to mock up your first connected device in less than a minute.
- Download Yeti Smart Home
Any Bigfoot-compatible software would work. Bigfoot is currently fairly young, so this is the first end user software tool that supports it. You can also contribute IoT open source software as part of the Netbeast Dashboard to implement Bigfoot.
- Choose a sample scaffold from the Bigfoot Project.
git clone https://github.com/netbeast/bigfoot-node
cd bigfoot-node/samples/mock-device
npm install
npm start
This is a sample in node.js. There are also samples in bigfoot-golang and python. We are looking for collaborators to create samples in other languages such as lua. Please send us a pull request!
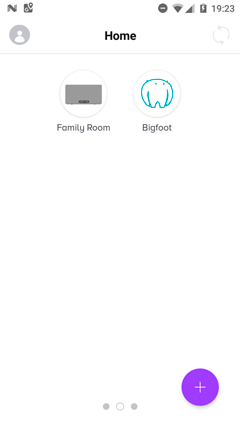
- Explore devices in Yeti
Done 👏🏽
Discovery
Allow your device to be discovered by Yeti or any other Bigfoot client.
var Server = require('node-ssdp').Server

server = new Server({
  sourcePort: 1900,
  udn: 'my-unique-string-identidier',
})

server.addUSN('bigfoot:all')

server.start()

process.on('exit', function() {
  server.stop() // advertise shutting down and stop listening
})
Check out the repo for examples in golang, python or other languages.
Congratulations, your device is alive!
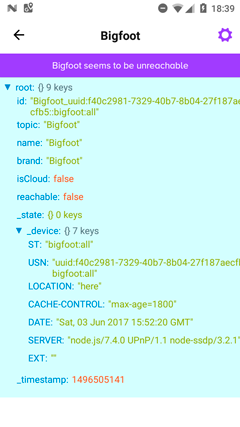
At the right you have the bare values of your device. It still has no functionality, so it will fail when you try to control it.
Let’s keep learning…
Ping
This is intended to be the most lightweight method to check that connectivity to your accessory works. If you implement an interface through HTTP (as described in skills) we’d only need to specify the port where the service is running as the location parameter:
const Ssdp = require('node-ssdp')
const express = require('express')
const app = express()

// respond with "hello world" when a GET request is made to the homepage
app.get('/', function (req, res) {
  res.send('hello world')
})

const httpServer = app.listen(3000, function () {
  const addr = httpServer.address().address
  const port = httpServer.address().port
  console.log('👾  Bigfoor ping sample started on %s:%s', addr, port)

  ssdpServer = new Ssdp.Server({
    location: `${addr}:${port}`,
    sourcePort: 1900,
  })
  ssdpServer.addUSN('bigfoot:all')
  ssdpServer.start()
})

process.on('exit', function() {
  ssdpServer.stop() // advertise shutting down and stop listening
  app.stop() // close express server
})
As you’d notice already, our device is still pretty dumb. We can only see it appears in our Yeti (Bigfoot compatible) device. This is because we had not specified any skill or topic that it can work as. So let’s move on now.
Skills
With skills we plan to refer the capabilities of what an accessory can do. For example, the simplest interface we can implement is a webview for Bigfoot compatible software:
// node/samples/webapp
const Ssdp = require('node-ssdp')
const express = require('express')
const ip = require('ip')
const app = express()

// Serve a web application to use as user interface or show data
app.use(express.static('public'))

const httpServer = app.listen(3000, function () {
  const addr = httpServer.address().address
  const port = httpServer.address().port
  console.log('👾 Bigfoot webapp example started on %s:%s', addr, port)

  ssdpServer = new Ssdp.Server({
    location: `http://${ip.address()}:${port}`,
    udn: 'Bigfoot_very-unique-bigfoot',
    sourcePort: 1900,
  })
  ssdpServer.addUSN('bigfoot:web')
  ssdpServer.start()
})

process.on('exit', function() {
  ssdpServer.stop() // advertise shutting down and stop listening
  app.stop() // close express server
})
After discovery or a request for your skills descriptor you must be able to communicate the things you are able to do, and let the other parties be aware of them. Skills are grouped in topics, so when you declare a topic every other Bigfoot compatible machine understands how to communicate with it immediately.
To declare an interface you’d only need to specify the topic on the USN:
ssdpServer.addUSN('bigfoot:bulb')
// or
ssdpServer.addUSN('bigfoot:app')
And Bigfoot compatible devices are going to interpret it as different devices.
Available topics
App: exposes an app through a webserver, so the developer can implement its own interfaceBridge: a device that can find and talk to other devicesBulb: to control lightning systemsMusic: things that can consumeThermostat: a heat / cold systemSwitch: a plug or system with two states (on/off)Sensor: an accessory with a read-only state, with keys and values to display
Implementing a topic
To understand Bigfoot messages you must only implement a protocol to listen to
the primitives and then specify it under location. The switch topic is the
simplest because you only have to understand ON / OFF set requests and to
return the state. This will be done by HTTP POST and GET methods respectively.
// node/samples/mock-device
const Ssdp = require('node-ssdp')
const express = require('express')
var bodyParser = require('body-parser')
const ip = require('ip')
const app = express()

let state = {
  power: 1,
  color: '#ffff00',
  brightness: 80,
  temperature: 50,
}

app.use(bodyParser.json())

app.get('/', function (req, res) {
  // Here you can return the switch state
  console.log('\n State requested:')
  console.log(state)
  res.json(state)
})

app.post('/', function (req, res) {
  // Maybe perform some validation, change any device internal handling and then
  // return back the state
  state = req.body.state || state
  console.log('\n State changed:')
  console.log(state)
  res.json(state)
})

const httpServer = app.listen(3000, function () {
  const addr = httpServer.address().address
  const port = httpServer.address().port
  console.log('👾 Bigfoot device mock started on %s:%s', addr, port)

  ssdpServer = new Ssdp.Server({
    suppressRootDeviceAdvertisements: true,
    location: `http://${ip.address()}:${port}`,
    sourcePort: 1900,
  })
  ssdpServer.addUSN('bigfoot:bulb')
  ssdpServer.start()
})

process.on('exit', function() {
  ssdpServer.stop() // advertise shutting down and stop listening
  app.stop() // close express server
})
Topics stand for a kind of device and groups a set of variables or dimensions to be used. It is a shortcut for the skills of an accessory. For example if the topic of your thing is light or bulb the rest of the parties will immediately know that you must support a certain state.
### State
Said of accessory values that can change without necessary user input. They reflect the nature of the appliance; Whether a bulb is on or off, a thermometer reads 30ºC or a movement sensor detects presence.
/* @flow */
export type BulbState = {
  power: 0 | 1,
  brightness: number, // percentage 0-100
  hue?: number, // degrees 0-360
  saturation?: number, // percentage 0-100
  color?: string, // hex conversion of the values above
}
*_ Flow is used to describe data types and interfaces throughout the codebase
These are the topics supported by Netbeast Dashboard so far:
/* @flow */
export type BulbState = {
  power: 0 | 1,
  brightness: number, // percentage 0-100
  hue?: number, // degrees 0-360
  saturation?: number, // percentage 0-100
  color?: string, // hex conversion of the values above
}

export type SwitchState = { power: PowerState }

export type MusicState = {
  status: 'playing' | 'paused',
  volume: number, // Not sure still that this is a percentage
  track: Url,
  position?: number,
  playlist?: Array<Object>,
  // rest to be defined
}

export type ThermostatState = {
  power: 0 | 1,
  temperature: number,
  units: 'celsius', 'farenheit',
  mode?: string,
}
Accessory properties
Accessory values that require user input through a software client to change, or simply don’t. This can be true for the accessory name, icon, label, room they belong, etc. The device MAC address or unique ID are typical immutable properties.
Changing the accessory name
By accessing the route /accessory, it should return all its qualities (both properties and state). For instance, this is
how Yeti serializes a Philips Hue bulb:
    {
      "id": "[UNIQUE IMMUTABLE STRING]",
      "name": "Front Lamp",
      "topic": "Bulb",
      "brand": "PhilipsHue",
      "room_label": "Bedroom",
      "bridge": {
        "id": "[UNIQUE IMMUTABLE STRING]",
        "ip": "192.168.1.101:80",
        "userId": "[SECRET UNIQUE STRING]"
      },
      "state": {
        "brightness": 98,
        "color": "#f90025",
        "colormode": "hue",
        "power": 0,
        "temperature": 6535.9477124183
      }
   }
If a Bigfoot accessory comes with a certain name, that’s what will be portrayed in Yeti Smart Home,
or what should be displayed in other clients. By implementing both GET and POST at the route
/accessory you will have an appliance with a custom name, that is synced across clients.
You can add a “bigfoot” field with information about the supported protocols and versioning:
"bigfoot": {
  "version": "0.1.0",
  "network_ssid": "netbeast",
  "network_pass": [SECRET STRING]
}
Create a bridge
You can use special topics as app or bridge to connect with accessories that
are outside current compatible protocols with the target Bigfoot client (i.e. Yeti)
🚧 This section is in construction
Roadmap
- Define the scope of the project
- Website
- Open channels for collaborators
- Write strategies
- Get Started
- Discovery
- Ping
- State Mutations
- Properties
/accessory - Pairing devices
- Reactive events
- Notifications
- Node.js
- Code samples
- Working samples with virtual devices
- Working samples with real devices
- Go
- Code samples
- Python
- Code samples
But you are still offering a protocol?
Not at all. Bigfoot project aims to gather a set of strategies over existing protocols and industry standards to make it easier for developers and manufacturers to create IoT experiences together. As React brought us that to representation interfaces, Bigfoot wants you to be able to create React-like hardware responses in a network environment with a set of simple and functional APIs.
Bigfoot topics is a suggested data structure that works out of the box with other tools in the belt. Because, you know, we need things working together :)
Anyway, those topics are borrowed from many other smart home devices, IoT
services and other established protocols. We are going to build translators
so you can use this schema as a middleware utility. But this is
not opinionated and completely optional. As a matter of fact they will have
a raw method alternative to access all the params obscured by any tools, in
case you want access to the internals of the things you are working with.
Contributing
Bigfoot is an Open Source Project. This means that:
Individuals making significant and valuable contributions are given commit-access to the project to contribute as they see fit. This project is more like an open wiki than a standard guarded open source project.
Read the Design Principles to understand the resoning behind our decision making. See the CONTRIBUTING.md guide for more details.
Sponsors
This project is a reality today thanks to its contributors and sponsors. We are proud to be part of the Toptal Open Source grant program, and compatible with Yeti

![]()